pumpkin ginger oat muffins

IMG_2915

I’ve just made it past the halfway point of my last fall term in nutrition grad school. I’ve been working with clients in clinic these past few weeks, experiencing all that I’ve learned in the last couple years come together in practice, and enjoying it so incredibly much. Getting to the clinical work has reinforced why I’ve spent so much of my energy on this career shift endeavor when I get to sit with someone and offer even a little bit of individualized support.

In addition to nutritional recommendations, I also give interventions that address balance from a whole systems perspective which is in line with the integrative and holistic approach to my program. This often means I try to emphasize stress reduction and relaxation practices. On the closer to home front, I’ve been trying to take some of my own advice and incorporate downtime each day for relaxing my system, an intention I constantly struggle with. Inevitably I often forego the rest I need and end up in the kitchen instead. My only excuse is it’s pumpkin season– and I find baking quite restorative!

IMG_2900IMG_2917

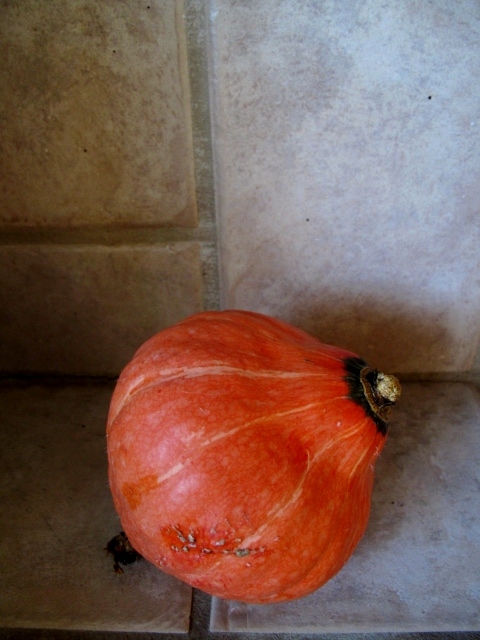
Since it is pumpkin and winter squash season, The Recipe Redux theme this month is Fresh from the Pumpkin Patch. We’ve had a string of mostly gorgeous days so far but once this fall season finally and truly sunk in, I began cooking lots of very autumn appropriate Ayurvedic recipes from Kate O’Donnell’s Everyday Ayurveda Cooking for a Calm, Clear Mind. Nutritionally, the recipes are helping rebalance my system after a rough end-of-summer transition. The first portion of the book is all about the Sattvic lifestyle in Ayurveda–a way of life I’ve been gleaning more from as time goes on and I notice how I fare better with less stimulating foods, practices, and experiences.

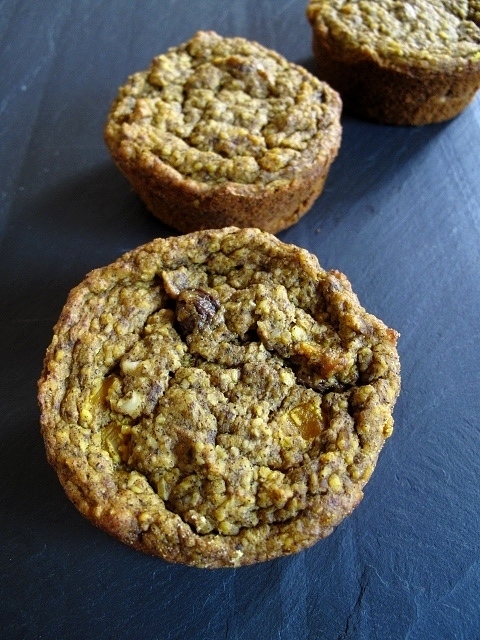
These muffins are a deviation from a recipe in the cookbook. If you’re a runner and a fan of the Run Fast Eat Slow superhero muffins, they’re also quite similar, but I’ve upped the emphasis on using walnuts and flax since they both are rich in omega 3’s which are an essential fatty acid that most of us need more of.

IMG_2921

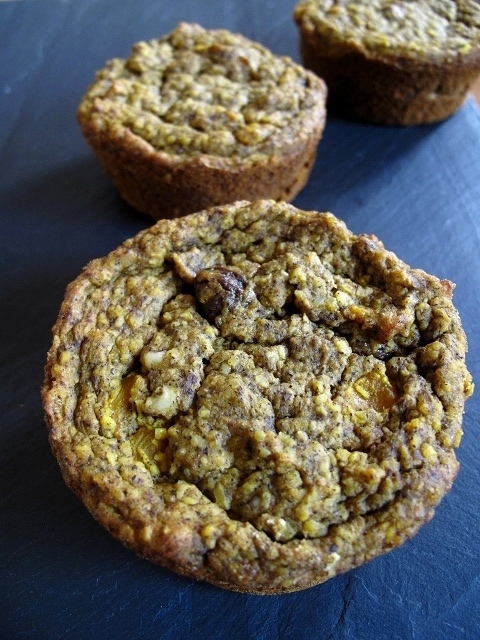
Pumpkin Ginger Oatmeal Muffins, makes 4 large muffins or 6 regular size
recipe updated: 2/18/2024
Even though I adapted these fairly dramatically, they do stay true to their ayurvedic roots. They are delicious as is but there are also many variations depending on what you’ve got on hand:
1) instead of ground walnuts, use almond flour 2) instead of pumpkin, use 1/2 cup applesauce and 1 medium chopped apple or other fruit and flavor combos. 3) instead of coconut sugar use pure maple syrup  4) instead of spices, add 1/2 Tbs. pumpkin pie spice and 1/4 tsp. turmeric

1 1/2 Tbs. ground flax seeds
4 1/2 Tbs. water
3/4 cup / 60 g raw walnuts, ground
1/2 cup + 2 Tbs. / 75 gr oat flour (can be made from oatmeal)
1/2 cup  / 50 gr oatmeal
1/4 cup / 50 gr organic cane sugar
1/4 tsp. salt
1/4 tsp. ground turmeric
3/4 tsp. cinnamon
pinch of cloves
1/2 tsp. baking soda
1 tsp. baking powder
pinch of ground black pepper
2 Tbs. / 25 gr coconut oil, melted
1 cup / 220 gr pumpkin, pureed or mashed
1 Tbs. / 3 g minced fresh ginger
1/4 cup / 35 gr raisins
1/4-1/2 cup water or nut milk, as needed.

  • Preheat oven to 350 degrees F. Line muffin tins with baking cups or oil and flour them.
  • In a medium bowl, whisk together the ground chia seeds and water. Let this stand for 5 minutes. In a separate bowl, mix the ground walnuts, oat bran and oats, salt, turmeric, baking soda, and baking powder.
  • Add the coconut sugar, pumpkin puree, and coconut oil to the chia seed mixture and stir until well combined. Stir in the ginger and the raisins.
  • Add the dry ingredients to the wet and mix until it just comes together. If the batter seems a touch dry, add water or nut milk just until it becomes a touch looser, but only add up to 1/2 cup, as they won’t need much. This step largely depends on how much moisture content your pumpkin puree has in it.
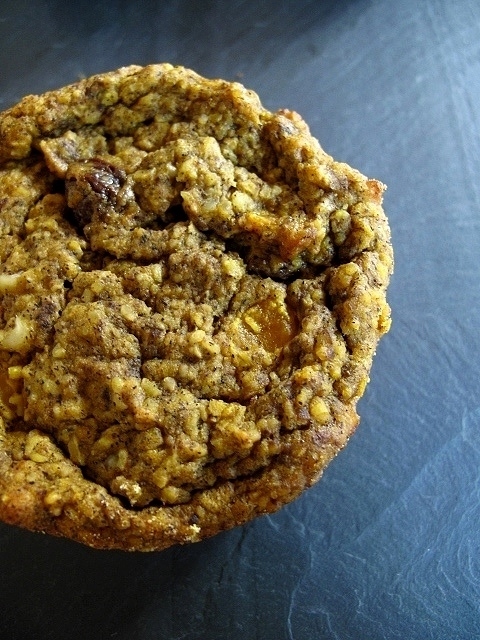
  • Divide into the muffin cups and bake for 25 to 30 minutes, or until they are golden brown and a toothpick in the middle comes out clean.

recipe-redux-linky-logo

Gluten-Free + Vegan Animal Crackers for Kids of All Ages


IMG_2829


I have vague but delicious memories of animal crackers as a child, a rare and special treat to be given a box of Barnum’s Animals all to myself, to open the package and to pick out each animal one by one, savoring it before reaching in for another.

Later in my teen years, I discovered the pink and white frosting and sprinkle version of animal crackers and they too became their own ritual, a big bag to share on a school road trip, or otherwise special occasion.


IMG_2839


Until last spring I’d forgotten about animal crackers and then one quick weekend getaway, walking the aisles of the local co-op, I saw the “natural” brand versions of these childhood treats and unexpectedly found that a little handful of those delicious crackers would be just the sweet I needed. Unfortunately, even within the allergen-free and natural brands, animal crackers that I can actually enjoy safely are pretty difficult to track down, so I set out to make my own.

What began as a whim and a craving became a tiny lovely treat that both William and I love to snack on after dinner, and taking this childhood favorite into our adult years, we found they pair particularly well with a Sicilian Rosé we tend to favor.  ;)


IMG_2830


This recipe is part of my monthly contribution to The Recipe Redux, a recipe challenge founded by registered dietitians and focused on taking delicious dishes, keeping them delicious, but making them better for you. The theme this month is Kids That Cook and we’re recreating some of our childhood favorites or what we’re cooking with kids now. While I never made animal crackers as a child, I did bake a lot of cookies, make playdough, and loved to watch my mom make a special occasion gooey cinnamon swirl bread which somehow was even better because it was our neighbor’s recipe.

What were your favorite childhood foods, homemade or otherwise?


IMG_2836


Animal Crackers {GF + Vegan}, makes about 100
Roll these to your desired thickness. I prefer them extra thin, William enjoys a little more cookie width. Also make sure to give a good pinch of nutmeg (make sure it’s fresh), as it really makes the difference. 

1 1/3 cups Gluten-Free Flour Blend
1/2 tsp. baking powder
1/4 tsp. salt
generous pinch of nutmeg and a little pinch of cinnamon
1/4 cup cashew butter
3 Tbs. unsweetened applesauce
1/3 cup organic cane sugar
1 Tbs. ground flax + 2 Tbs. warm water – thickened for 5 minutes
1/2 tsp. pure vanilla extract

  • In a small bowl, whisk together the dry ingredients and set aside.
  • In a larger bowl, whip the cashew butter with a fork until creamy and then add the applesauce and sugar and mix until thoroughly combined. Then add the flax and water mixture and vanilla  and blend it all together.
  • Add the dry ingredients slowly into the wet mixture and stir until the mixture comes together into a cookie dough ball.
  • Cover the bowl of dough well and chill in the fridge for at least an hour.
  • When ready to bake, preheat the oven to 350 degrees F.
  • Coat a flat surface with a little flour and roll about 1/3 of the dough to 1/4″ thickness. Using mini animal cookie cutters, cut out the cookies. If you’d like to make them a little more realistic, simply use a toothpick to create an eye for each animal.
  • Place on a baking sheet and bake for 8-10 minutes, just until the edges begin to lightly brown.
  • Continue to roll out and bake the remaining cookies.

recipe-redux-linky-logo

Sourdough Pizza! {gluten + dairy-free}

img_8102.jpg

Every summer I have a meal that’s on repeat, usually as a way to use what’s coming in fast from the garden or otherwise to appease my cravings. Last summer that was kitchari and a green soup/sourdough pairing, the summer before that was zucchini noodles and pesto, and this summer it is this sourdough pizza with roasted vegetables. I’ve been making this pizza on the weekly for months and am not about to grow tired of it.

IMG_2756.JPGIMG_2759

If you’ve ever tried gluten-free pizza out on the town, you’ll likely know the experience is regularly disappointing and the ingredient list is fairly terrible. I’ve almost entirely given it up, especially too since there are very few establishments where cross-contamination is not a huge issue. (I once worked in a bakery. When working with flours, gluten is everywhere.) What I like about this recipe is that it’s super easy, takes only minimal planning ahead, is truly bready and delicious, allows me to feed my sourdough starter regularly without making way more bread than I can eat or throwing it out, and the sourdough fermentation allows for better mineral and vitamin absorption from the flours, leading to overall happier digestion and long-term health.

Prior to a few years ago, pizza was my long-time favorite food, and still is William’s, and this crust satisfies his discerning pizza palate enough that it actually qualifies as pizza, whereas most gluten and dairy free versions do not. Our favorite way to top this lately, in addition to the roasted vegetables and our house red sauce, is to slide a fried egg on top, but I deviated here and listed my topping ideas and recipes below.

IMG_2763

IMG_2761

Sourdough Pizza Crust {gf + vegan}, makes 1 medium pizza, enough for about 3 people
This is adapted from King Arthur Flour’s sourdough recipe, which uses wheat flour. If you’re not gluten-free, the recipe should still work in the same quantities by swapping out the flour types. 

120g sourdough starter (50:50 buckwheat flour:water)
100 g hot tap water
150 g all-purpose gluten free flour
½ teaspoon sea salt
¼ tsp. yeast

  • If any liquid has collected on top of your refrigerated starter, stir it back in. Spoon 120 grams starter into a mixing bowl. Note: Then feed the remainder of your starter.
  • Add the hot water, flour, salt, and yeast. Mix to combine. It will at first be fairly wet. Cover the bowl and allow to rise until it’s just about doubled in size. This will take about 2 to 4 hours. The time it takes to rise depends on when you last fed the starter; a starter that’s been fed rather recently will react to the addition of flour and water more quickly than one that’s been neglected for a while. For a faster rise, place the dough somewhere warm (or increase the yeast). To slow it down, put it somewhere cool.
  • When the dough is risen, but still fairly wet, pour it out onto a pizza stone or pan and shape it into a flattened disk. Sprinkle the dough with a small amount of flour and then with a rolling pin that also has been lightly floured, gently roll the dough towards the edge of the pan; when it starts to shrink back, let it rest again, for about 15 minutes. Finish pressing the dough to the edges of the pan. Cover the pan, and let the dough rise until it’s as thick as you like, or, if you’re impatient, beginning topping as it is.
  • Towards the end of the rising time, preheat your oven to 450°F.
  • Turn the edges of the dough over to give it a traditional crust, or if you forget as I did above, it will still turn out just great.
  • Top with your preferred sauce and toppings, and bake for 15-16 minutes, or until the toppings are as done as you like, and the bottom is cooked through.

My current favorite toppings:
Our house pizza/tomato sauce
Sophie’s Cashew Mozzarella
Tempeh Sausage
Seasonal Roasted Vegetables
A fried egg for each serving