Yellow Squash Soup

IMG_2875

A couple of weeks ago I had the opportunity to co-star in an impromptu garden photo shoot.  The resulting bounty of said garden inspired this yellow squash soup.  My mom pulled out an old wooden fruit crate  where we stowed our bounty during the shoot.  I pulled on my wellies, and snatched a few sunflowers.  We ate beans right off the plant, and pretended to look cool with our hoes– an immature, yet funny photo shoot joke.  After all was said and done, it turned out to be a beautiful, unexpected moment captured in the company of good friends.

–A garden truly is a beautiful place for inspiration.

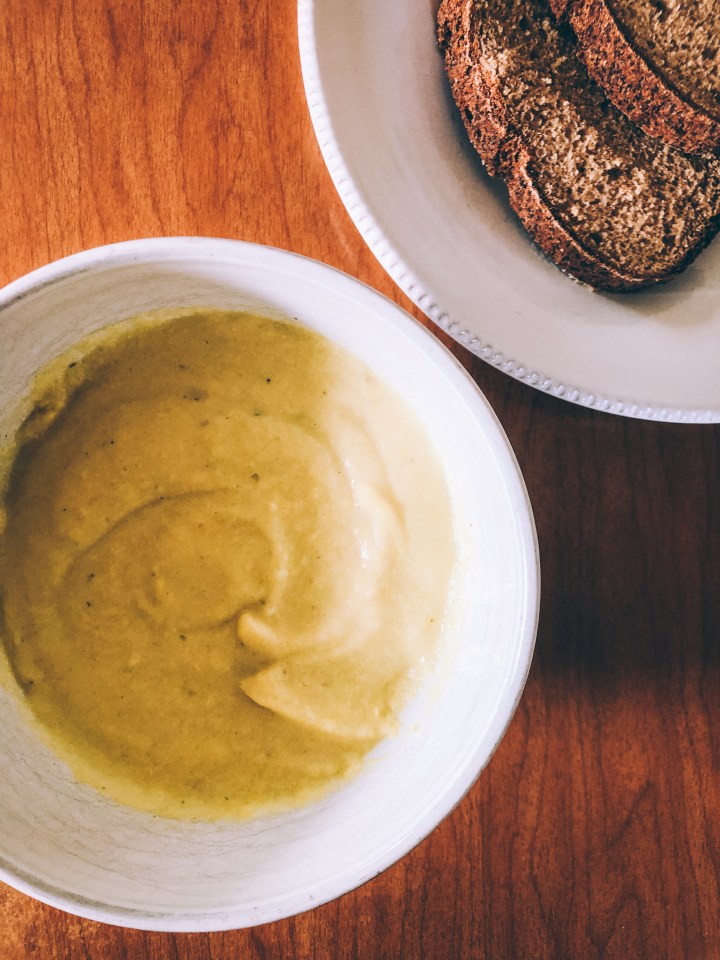
This soup is one I’ve adapted from a recipe given to my mom from an old family friend years ago.  Our family grew up with Sally’s soup each summer, as this was one of mom’s ways to get rid of a few of those extra large zucchini she couldn’t keep up with during the summer months.  This serves about four, so double or triple for a larger crowd.  It can also be frozen for eating later when summer squash are a distant memory!

IMG_2873

Summer Squash Soup, serves 4
Recipe Updated: 9/21/21

6 cups medium-chopped yellow summer squash
1 cup chicken broth or vegetable-based mineral broth
1 large onion, diced
3/4 tsp. salt
1 tsp. dried oregano
2 T. butter, ghee, or olive oil
1/4 cup whole grain flour (brown rice, sorghum, chickpea, or wheat if tolerated are good choices)
1 cup chicken broth or vegetable-based mineral broth
1 cup plain yogurt or cashew cream
Red pepper flakes, optional

  1. In a large pot, simmer squash, 1 cup chicken broth, onion, salt, and oregano until tender and the squash pieces are starting to fall apart.
  2. Transfer the squash mixture to a blender and puree until smooth.  Set aside.
  3. In the same pot that squash was cooked in, melt the butter, ghee or olive oil.  Whisk in the flour and then gradually add the remaining 1 cup of broth to form a roux.
  4. Gradually add the squash mixture back into the pot. Stir in yogurt or cashew cream to a desired consistency.  Adjust seasoning as needed.  Bring up to preferred heat carefully!

Apricot-Carrot Muffins

Growing up, I looked forward to certain special aspects that summer brings.  Aside from camping trips and county fairs, summer brought fresh fruit from my grandparents.  By the box.  My grandparents live in the heart of Washington’s orchard country, and if they don’t have too much fruit falling from their own trees, they somehow acquire a box (or several) somewhere else.  Usually, we’d get apples and perhaps peaches or plums.

A recent visit home found a box of apricots nestled in the back refrigerator.  It was no surprise that they came from my grandpa’s tree.  After gobbling up several for a snack, I had to take a few with me.  Somehow, they found their way into the healthiest (and tastiest) of breakfasts.  Usually, muffins are an autumn-breakfast thing around here.  But with this fruit just waiting to be baked (and going-limp carrots wanting to be consumed), I managed to change it up a little.

If you can find any last apricots before they’re all gone for the season, please do try to acquire them, and eat them slowly, savoring the last few days (or is it weeks?) that summer has left to offer!


Apricot-Carrot Muffins
3/4 cup whole wheat flour
3/4 cup oats
1/4 cup all-purpose flour
1/4 cup oat flour
1/2 cup brown sugar
1 large egg
1 cup diced fresh apricot
1 cup grated carrots
2 tsp. baking powder
1/2 tsp. salt
1 Tbs. vegetable oil
3/4 cup milk
 
1. Make oat flour by grinding oats in a food processor until fine.
2. Dice apricots and grate carrots.
3. Bring together flours, oats, baking powder, salt and sugar in a large bowl.  Make a well in center and set aside.
4. In a separate bowl, whisk together egg, oil, and milk.  Pour into flour mixture.  Give the bowl a couple of turns with a spoon and then stir in carrots and apricots.  Only stir until mixture is just incorporated.
5. Spoon into muffin tins.
6. Bake at 400 degrees F. for approximately 20 minutes or until golden and insides are set.
7. Enjoy fresh from the oven!!

DIY–Whole Grain Mustard

Sometimes we take for granted. We forget that much of our life has been built around convenience–helping us to speed ever faster forward, but perhaps enjoying neither the direction nor the journey itself.  Take mustard for instance.  Prior to learning to make my own (and being surprised how simple it is!) I’d never even thought about the process.  But the jar of fancy French Dijon or Spicy Brown that I reach for on a frequent basis is really a jar containing few ingredients that can be easily made myself.  It makes me wonder.  What else, in our quest for newer/better/faster have we lost?

At home, over the 4th of July, we had a breakfast with my family and our neighbors, my long-time friend, K’s family.  I made a tart–a recipe I will make here–out of homemade mascarpone cheese.  It was so easy.  My dad and K’s dad discussed how both their generation and ours have lost the knowledge of thrift and resourcefulness.  For instance,  I had an excess of heavy cream sitting around that I didn’t know what to do with.  So I made cheese.  The fancy kind of cream cheese that costs more in the grocery store.  There were two ingredients and it barely took any time.  I think I’m on to something!

So why have we lost the ability to know about these types of things?  It’s simple–or rather, really complicated.  It’s the 21st Century, baby.  We’re moving forward!  So should we all go back to the days where we grind our own mustard seeds (in a pepper mill here), and make our own cheese?  Perhaps not.  Though knowing that we can–or how to be resourceful to prevent waste–may prove useful.  After all, we may only be a generation or two away from our children having no thought as to how or where their food is produced.

Wholegrain Mustard, adapted from Forgotten Skills of Cooking
1/3 cup white wine vinegar
3 Tbs. yellow mustard seeds
2 Tbs. brown mustard seeds
2 Tbs. white wine vinegar
1 Tbs. honey
1 tsp. salt
  • Pour the white wine vinegar over the yellow mustard seeds and leave to soak for 3-5 days.  You may have to periodically add more vinegar so the seeds are covered.  (The longer this sits, the hotter the mustard will be).
  • When it is finished soaking, use a food processor to roughly grind the yellow seeds.  Then grind the brown seeds into a fine powder using a spice mill, mortar and pestle, or as a last resort, a pepper mill.  Mix the two mustards together with the remaining white wine vinegar, honey, and salt.
  • Alternatively, if you have a magic bullet or the like, skip the spice mill step, and throw the yellow seed mixture and the remaining ingredients into the blender with the flat blade, and after a few seconds, your mustard is done!
  • Fill into small glass jars.  Cover and store in a cool, dry place.

A recipe to use the mustard with (a lovely, summer salad) coming soon!