pumpkin ginger oat muffins

IMG_2915

I’ve just made it past the halfway point of my last fall term in nutrition grad school. I’ve been working with clients in clinic these past few weeks, experiencing all that I’ve learned in the last couple years come together in practice, and enjoying it so incredibly much. Getting to the clinical work has reinforced why I’ve spent so much of my energy on this career shift endeavor when I get to sit with someone and offer even a little bit of individualized support.

In addition to nutritional recommendations, I also give interventions that address balance from a whole systems perspective which is in line with the integrative and holistic approach to my program. This often means I try to emphasize stress reduction and relaxation practices. On the closer to home front, I’ve been trying to take some of my own advice and incorporate downtime each day for relaxing my system, an intention I constantly struggle with. Inevitably I often forego the rest I need and end up in the kitchen instead. My only excuse is it’s pumpkin season– and I find baking quite restorative!

IMG_2900IMG_2917

Since it is pumpkin and winter squash season, The Recipe Redux theme this month is Fresh from the Pumpkin Patch. We’ve had a string of mostly gorgeous days so far but once this fall season finally and truly sunk in, I began cooking lots of very autumn appropriate Ayurvedic recipes from Kate O’Donnell’s Everyday Ayurveda Cooking for a Calm, Clear Mind. Nutritionally, the recipes are helping rebalance my system after a rough end-of-summer transition. The first portion of the book is all about the Sattvic lifestyle in Ayurveda–a way of life I’ve been gleaning more from as time goes on and I notice how I fare better with less stimulating foods, practices, and experiences.

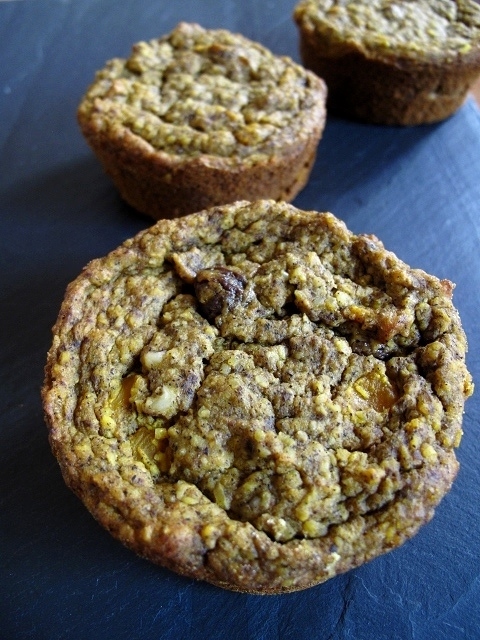
These muffins are a deviation from a recipe in the cookbook. If you’re a runner and a fan of the Run Fast Eat Slow superhero muffins, they’re also quite similar, but I’ve upped the emphasis on using walnuts and flax since they both are rich in omega 3’s which are an essential fatty acid that most of us need more of.

IMG_2921

Pumpkin Ginger Oatmeal Muffins, makes 4 large muffins or 6 regular size
recipe updated: 2/18/2024
Even though I adapted these fairly dramatically, they do stay true to their ayurvedic roots. They are delicious as is but there are also many variations depending on what you’ve got on hand:
1) instead of ground walnuts, use almond flour 2) instead of pumpkin, use 1/2 cup applesauce and 1 medium chopped apple or other fruit and flavor combos. 3) instead of coconut sugar use pure maple syrup  4) instead of spices, add 1/2 Tbs. pumpkin pie spice and 1/4 tsp. turmeric

1 1/2 Tbs. ground flax seeds
4 1/2 Tbs. water
3/4 cup / 60 g raw walnuts, ground
1/2 cup + 2 Tbs. / 75 gr oat flour (can be made from oatmeal)
1/2 cup  / 50 gr oatmeal
1/4 cup / 50 gr organic cane sugar
1/4 tsp. salt
1/4 tsp. ground turmeric
3/4 tsp. cinnamon
pinch of cloves
1/2 tsp. baking soda
1 tsp. baking powder
pinch of ground black pepper
2 Tbs. / 25 gr coconut oil, melted
1 cup / 220 gr pumpkin, pureed or mashed
1 Tbs. / 3 g minced fresh ginger
1/4 cup / 35 gr raisins
1/4-1/2 cup water or nut milk, as needed.

  • Preheat oven to 350 degrees F. Line muffin tins with baking cups or oil and flour them.
  • In a medium bowl, whisk together the ground chia seeds and water. Let this stand for 5 minutes. In a separate bowl, mix the ground walnuts, oat bran and oats, salt, turmeric, baking soda, and baking powder.
  • Add the coconut sugar, pumpkin puree, and coconut oil to the chia seed mixture and stir until well combined. Stir in the ginger and the raisins.
  • Add the dry ingredients to the wet and mix until it just comes together. If the batter seems a touch dry, add water or nut milk just until it becomes a touch looser, but only add up to 1/2 cup, as they won’t need much. This step largely depends on how much moisture content your pumpkin puree has in it.
  • Divide into the muffin cups and bake for 25 to 30 minutes, or until they are golden brown and a toothpick in the middle comes out clean.

recipe-redux-linky-logo

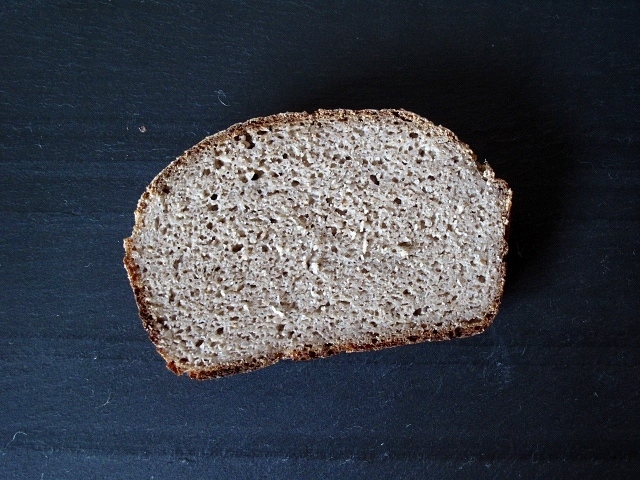
Whole Grain Gluten-Free Sourdough Bread

IMG_2671

This summer, myself and a group of fellow nutrition students and alums are reading Deep Nutrition for a book club we’ve started. The theme of the book is about the benefits of traditional diets, somewhat in the Weston Price tradition, for optimal health. I cannot yet comment on what I think of the book as I haven’t read enough to have a strong opinion, but the idea of eating more in the traditional style with its emphasis on whole foods as close to the source and as untouched as possible from chemicals and the like has been a major theme in my nutritional courses over the past two years. It is also a viewpoint I adopted years ago when figuring out how to truly recover from the diet culture I was immersed in and which was contributing to my eating disorder behaviors around foods. In my classes, we’ve also delved a lot into the need for promoting gut health, since a healthy, happily functioning gut can be thought of as the foundation to health in the body and mind far beyond our digestive region. This also happens to be a topic that is near and dear to me because it’s one of my main health struggles.

As I’ve mentioned before, The three major nutritional practices that promote gut health are eating more fiber, eating more fermented foods, and reducing sugar and refined carbohydrate intake.

IMG_2660

Last summer, after a particularly rocky winter and an autoimmune lab marker coming back positive, I began a very focused fine-tuning of my diet and lifestyle, in relation to improving gut health and my reaction to stress, since both strongly contribute to autoimmune conditions. As part of that process, I began a return to making sourdough.

Sourdough, as the name suggests, is a traditional fermentation process where wild yeasts ferment the flours, making them easier to digest because the yeasts create lactic acid, and which then break down anti-nutrients that plants make to protect themselves, such as phytates and lectins. These anti-nutrients block mineral absorption and the resulting sourdough can contain a lot more readily absorbable nutrients than the original unfermented flours or grains. Additionally, the process of fermentation more generally makes all the proteins in the bread easier to digest, and it is the protein that is usually causing an inflammatory reaction for those with GI issues like intestinal permeability, malabsorption, celiac disease, and other autoimmune conditions. Due to our hectic lifestyles and often very non-whole-foods diets, many, many of us have at least some of these symptoms and/or diagnoses that could be improved by adding more fermented foods, in addition to the other two gut health promoting practices of eating more fiber and reducing sugar and refined carbohydrates.

IMG_2648IMG_2651

For someone that is very sensitive to gluten like me, there’s also good news from eating gluten-free sourdough, as there are research indications that the fermentation process involved in making traditionally fermented gluten-free bread reduces the release of inflammatory compounds within the gut for someone who has recently adopted a gluten-free diet due to a celiac diagnosis, whereas consuming other types of gluten-free bread did not reduce these inflammatory responses1.

IMG_2655

Maybe it’s the tea-drinking, sweater-garbed, sourdough-baking wise grandmother in me, but I can’t help but think, of course, to that news. It simply seems that our systems recognize and respond better to the more traditionally made foods like sourdough. Whenever I have a GI flare-up these days, I definitely try to put extra focus on avoiding those refined gluten-free products and even whole grains that weren’t cooked really well, and emphasize sourdough for my grain consumption. I’m finding this helps me return to balance more quickly. For someone that doesn’t react so strongly to gluten, consuming sourdough instead of regularly-baked bread still contributes all the positive benefits I mentioned above about keeping the gut happy and increasing nutrient absorption.

So now, after more than a year of refining my gluten-free sourdough method, I have a recipe I feel good about sharing!

IMG_2673

Whole Grain Gluten Free Sourdough Bread, makes 1 sandwich/toast loaf
– Adapted from Baking MagiqueWholehearted Eats, and with tips from Bad Hunter Stories.
– I have a 100% buckwheat starter that I began using this formula. I did not add any outside culture, but simply created it from the wild yeasts in my home. This meant it took a little longer for the starter to get good and active initially.
– For the buckwheat and oats, I often start with whole grains which I grind in my coffee/spice grinder each time I bake and feed the starter.
– I only make this using a kitchen scale rather than measuring cups, and I’ve found I can interchange the flours, by weight, using this method.
– Using slightly different flours along with the the outside weather will result in needing to change the amount of water. Err on the side of having a fairly moist dough that still comes together. 

80 g brown rice flour
140 g cold buckwheat sourdough starter
110 g water
————–
350 g water at room temperature + more as necessary to reach the desired consistency
20 g psyllium husk
10 g ground flax seeds
————–
60 g of each
– sorghum flour
– oat flour
– buckwheat flour
– millet flour
– teff flour
24 g / 2 Tbs. sugar or honey
1 tsp. sea salt

  • In the evening: Mix brown rice flour, sourdough starter and water in a bowl and cover with a clean kitchen towel. Let sit overnight (about 8-12 hours) in a warm and non-drafty place.
  • In the morning: Mix water, psyllium husk and ground flaxseeds in a bowl and whisk until a thick gel forms. Set aside.
  • In a separate bowl mix all of the dry ingredients.
  • Add the sourdough starter that you made the night before to the wet ingredients and mix.
  • Add the wet mixture to the dry ingredients and stir with a wooden spoon until the flour is fully incorporated. Add a small amount of filtered water, if needed, to arrive at a moist ball of dough.
  • Line a loaf pan with parchment and dump the dough into the pan, smoothing it out into a loaf shape and leveling it into all the corners. Cover with the clean kitchen towel or plastic bag and put in a warm place away from drafts. Allow to rise for 4-6 hours. This will depend on your kitchen warmth. Mine tends to stay cool so I err on the side of 6 to even 6 1/2 hours usually.
  • Preheat the oven to 500°F/260°C. Once the oven’s hot, remove the towel or bag from the loaf, and score the top with one or two good slashes with a sharp knife.
  • Put the loaf in the oven and turn the temperature down to 450°F/230°C. Bake for 70 minutes or until the internal temperature reaches a little over 200°F/90°C.
  • Let the loaf cool on a wire rack for at least an hour, before slicing.

1. Calasso, M., Vincentini, O., Valitutti, F., Felli, C., Gobbetti, M., and Di Cagno, R. (2012). The sourdough fermentation may enhance the recovery from intestinal inflammation of coeliac patients at the early stage of the gluten-free diet. European Journal of Nutrition,51(4). 507-12. doi: 10.1007/s00394-012-0303-y.

Pumpkin Pie + Holiday Thoughts

Pumpkin Pie + Holiday Thoughts

img_0915


The Recipe Redux theme for November is healthy holiday baking. If you’re new to this space, The Recipe Redux is a monthly recipe challenge, founded by three registered dietitians, which I participate in. The challenges are always focused on taking delicious dishes, keeping them delicious, but making them better for us.


image


In light of this season, I’ve been doing a bit of reflection on where I stand in the interchange between decadent holiday foods and how I eat from day to day. Should I splurge and not worry about some of those really not healthy ingredients because it is the holidays, or should I try to capture the essence of health in enjoyable foods because it is the holidays –and we all tend to overeat and regret it later?

Additionally, as a result of all that I’ve been learning of health and nutrition and where I stand right now in aiming to maintain a healthy relationship with food, I’ve been returning to passages from Annemarie Colbin’s Food and Healing: 

With all the recent emphasis on “healthy” eating, it is important to remember one thing: Food does not make us healthy. The right kind of food will allow us to reach our maximum health potential, to become as healthy as our genes and constitution may permit. It will support what we are at our best. It will not interfere with our development, but it will also not make us more than what we can be. In short, good food is effective because it is passive. The wrong kind of food will act like a block or a dam, deflecting our growth and thwarting our unfolding. In other words, it will actively create trouble, and make us unhealthy…Good food will nourish us without causing stress, and thus allow our immune system to spend its energy in healing. Thus many different diets will have healing effects. Often it is not just what we eat, but also what we don’t eat that helps us become healthy again. 

So my theory right now? Stressing about eating the right kinds of food is not healthful. But neither is eating foods that overtax and/or stress our bodies, foods like highly refined sugars, refined flours/grains, and rancid oils, to name a few. Sure, they’re fine in small quantities infrequently. For the most part however, they’re best avoided, even (and maybe especially) during the holidays. Aren’t we all a little too stressed in this season? Don’t we deserve to feed ourselves and our loved ones foods that have healing qualities?


img_0923

img_0886


My advice is to do what you can with what you have. But maybe as you venture into this holiday season, do so a little more mindfully, thinking to yourself, How do I want my body to feel after eating? What foods will nourish me best? 


img_0875


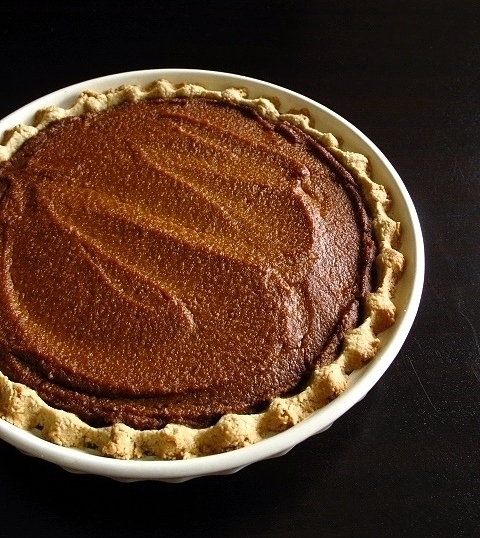
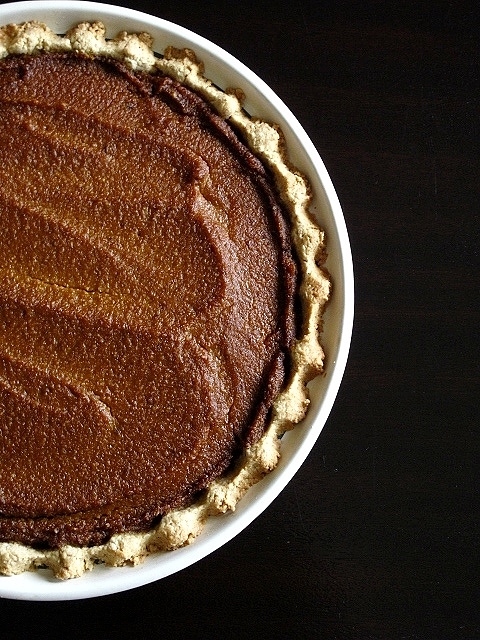
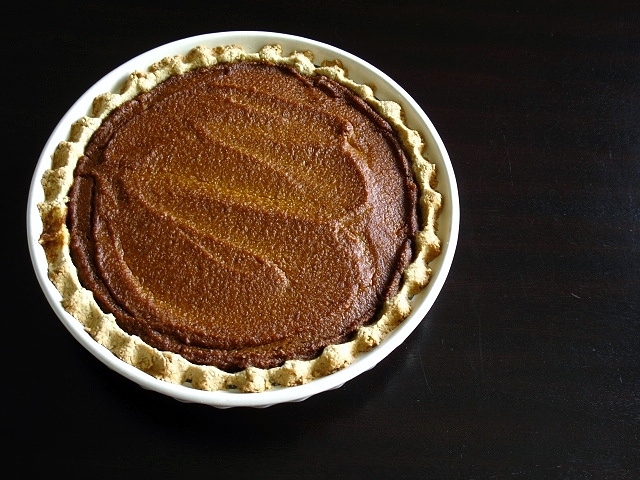
Pumpkin Pie, makes one 9-inch pie
Truthfully, I never liked pumpkin pie until I stopped eating dairy and enjoyed a vegan version of the classic. The creamy custard base always turned me off. Now I love pumpkin pie and count it as one of my favorite flavors. While there are innumerable versions swirling about this time of year, this is the one I make and enjoy. It is adapted from Gena Hamshaw’s pie in
Food52 Vegan and while I enjoy her version, I’ve changed it a bit so dates are the primary sweetener and, in my years-long quest to find a good gluten-free and vegan pie crust with no coconut oil (which I cannot stand in fat-heavy pastry doughs), I’ve finally come to a closer-to-whole-foods crust that tastes like what I think a pie crust should. It gets extra points for not needing to be rolled, chilled, or being difficult to work with. Enjoy!

filling:
2 1/2 cups baked + pureed pumpkin or winter squash, or canned puree
1 cup cashews, soaked for at least 4 hours
1 cup medjool dates (about 10)
2 tsp. pure vanilla extract
1/4 tsp. sea salt
2 Tbs. tapioca starch
2 Tbs. blackstrap molasses
1 tsp. cinnamon
1/2 tsp. ginger
1/4 tsp. nutmeg
a couple good pinches of cloves

crust:
1 cup rolled oats
1/4  cup + 2 Tbs. almond meal/flour
3/4 cup millet flour
pinch of sea salt
4 1/2 Tbs. good quality canola oil
3 Tbs. maple syrup
3/4 tsp. vanilla

  • Begin by baking the pumpkin or squash, if using, and soaking the cashews in water a few hours ahead of time.
  • Then, soak the dates in warm water for about an hour to soften up. Once the dates have soaked, keep 1/2 cup of their soaking liquid and put in a food processor along with the pitted dates, vanilla, and salt. Puree until completely smooth.
  • Into the food processor with the date puree, add the soaked and drained cashews, starch, molasses, and spices. Puree again, until completely smooth. Then add the pumpkin and puree once again until completely mixed. Then set aside to make the crust.
  • At this point, preheat the oven to 350 degrees F.
  • Finely grind the oats into a flour using either a food processor or coffee grinder.
  • Then, in a mixing bowl, whisk together the oats, almond and millet flours and salt.
  • In a liquid measuring cup, stir together the oil, maple syrup and vanilla. Then pour the liquids over the dry ingredients and mix together with a fork until the dough is evenly moistened.
  • Dump the entire mixture into a 9-inch pie pan, and with your fingers, spread the dough across the bottom and up the sides. A flat-bottomed measuring cup, glass, or mini rolling pin helps smooth the bottom.
  • Crimp the edges, and then fill the crust with the pumpkin mixture.
  • Bake for 35-40 minutes, until the filling is a golden brown.
  • Remove from the oven and let cool completely before serving.